Chicken Tenders Raw: Your Ultimate Guide to Prep, Cook & Perfect Them
Let's be honest. A pack of raw chicken tenders sitting in your fridge is potential. It can become a dry, bland disappointment or the star of a fantastic meal. The difference isn't magic—it's a handful of simple, often overlooked steps. I've cooked thousands of these over the years, from busy restaurant lines to my home kitchen, and I've seen every mistake in the book. This guide cuts through the noise. We'll cover exactly what chicken tenders are, how to handle them safely, the secrets to flavoring them, and the precise techniques for frying, baking, and air frying. By the end, you'll have the confidence to turn that raw potential into something reliably delicious.
What You'll Learn Here
What Are Chicken Tenders, Really?
First, let's clear up the confusion. That package labeled "chicken tenders" or "chicken tenderloins" contains a specific muscle. It's the pectoralis minor, a small, tender strip that lies underneath the main breast meat. Because it gets less work, it's inherently more tender (hence the name) and has a slightly different texture than the main breast.
But here's where things get messy at the store. You'll often see "chicken tenders" sold as-is, but sometimes they're cut from a larger breast. True tenderloins are a natural cut. Knowing this helps you manage expectations on size and cooking time. A real tenderloin cooks faster than a piece of breast cut into a "tender" shape.
How do they stack up against other cuts? This table breaks it down.
| Cut of Chicken | Texture | Best For | Cook Time (for 6oz) |
|---|---|---|---|
| Chicken Tenderloin (Raw) | Very tender, fine-grained | Quick cooking, frying, salads, kids' meals | 6-10 minutes |
| Boneless Skinless Breast | Lean, can be dry if overcooked | Grilling, baking, slicing for sandwiches | 15-20 minutes |
| Chicken Thigh | Juicy, fatty, flavorful | Braises, grilling, where rich flavor is needed | 20-25 minutes |
How to Prep Raw Chicken Tenders: Safety and Flavor First
This is the stage where most meals are won or lost before the pan even heats up. Rushing here leads to uneven cooking and food safety risks.
Step 1: Safe Handling and Patting Dry
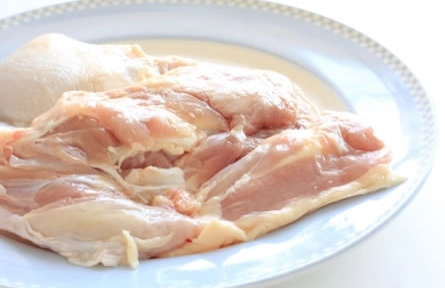
Take the tenders out of the package. I immediately transfer them to a plate or cutting board. Don't rinse them. The USDA has been clear on this for years: rinsing raw poultry splashes bacteria around your sink, creating a bigger safety issue than you solve. Cooking to the proper temperature kills any bacteria present.
Instead, grab a few paper towels and pat each tender completely dry. This is non-negotiable. Moisture is the enemy of browning. If the surface is wet, it will steam instead of sear, leaving you with pale, unappetizing meat. I pat them until the paper towel comes away barely damp.
Step 2: The Trim (It's Optional)
Look at each tender. You might see a white, tendon-like piece running along one side. That's the... tendon. You can leave it. It's edible and softens when cooked. But if you or your kids are texture-sensitive, grip it with a paper towel (for grip) and use a sharp knife to slide underneath it, pulling it off. It takes 10 seconds per tender.
Step 3: The Marinating Game-Changer
You can just season and cook. But a marinade transforms raw chicken tenders from a vehicle for sauce into a flavorful component themselves. The key is acidity and salt. Acid (like lemon juice, yogurt, buttermilk) tenderizes the surface. Salt penetrates, seasoning the meat throughout.
My 30-Minute "Never Fail" Marinade: For 1 lb of raw tenders, whisk together 1/4 cup olive oil, 2 tbsp lemon juice, 1 tsp kosher salt, 1 tsp paprika, 2 minced garlic cloves, and a big pinch of black pepper. Toss the dried tenders in it, let them sit in the fridge for at least 30 minutes (or up to 4 hours). That's it. The difference is night and day.
Buttermilk is another classic, especially if you're planning to bread and fry. Soak for at least 2 hours, or overnight. The lactic acid works wonders.
The Best Ways to Cook Chicken Tenders
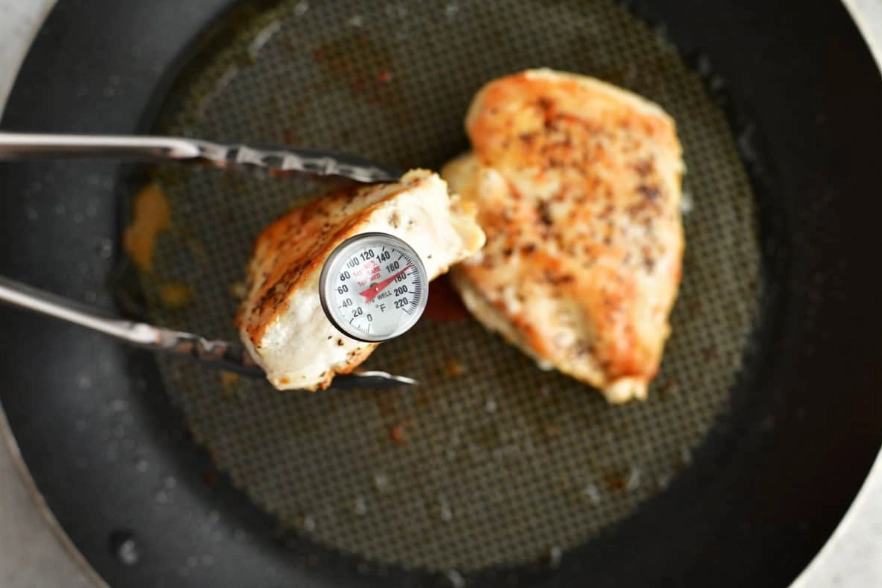
Now for the fun part. Here’s how to apply heat to your prepped raw chicken tenders for perfect results every time. Internal temperature is your best friend—aim for 165°F (74°C) as measured by an instant-read thermometer. They'll carry over to about 170°F as they rest.
Pan-Frying for Maximum Flavor
This is my favorite method for a quick, crispy exterior. Heat a large skillet (cast iron or stainless steel works best) over medium-high heat. Add a high-smoke-point oil—avocado, canola, or vegetable oil—enough to coat the bottom. Wait until the oil shimmers.
Lay your seasoned or marinated tenders in the pan. Don't crowd them. You should hear a confident sizzle. Cook for 3-4 minutes without moving them, until you see golden brown edges creeping up the sides. Flip and cook for another 3-4 minutes. That's usually all it takes. The direct heat creates a fantastic crust.
Baking for Hands-Off Ease
Preheat your oven to 400°F (200°C). Place a wire rack on a baking sheet and spray it with oil. Arranging the tenders on a rack allows hot air to circulate, preventing a soggy bottom. Drizzle or brush them lightly with oil. Bake for 15-18 minutes, flipping halfway through. They're done when firm to the touch and opaque throughout.
Air Frying: The Modern Shortcut
This is where raw chicken tenders truly shine. The air fryer's rapid convection creates a crispy exterior with minimal oil, mimicking deep-frying. Preheat your air fryer to 380°F (193°C). Lightly spray the basket with oil. Arrange the tenders in a single layer—again, no crowding. Cook for 8-10 minutes, flipping halfway. Check for doneness at the 8-minute mark. The exact time depends on the size and your specific appliance, so start checking early.
For breaded tenders, spray the breading lightly with oil before cooking to help it crisp up.
Top 3 Mistakes People Make with Raw Tenders (And How to Fix Them)
After watching countless home cooks, these are the errors I see on repeat.
Mistake 1: Skipping the Dry Patrol. We covered this. Wet meat = steamed, grey meat. Pat it dry. Always.
Mistake 2: Crowding the Pan. This is the #1 reason for soggy, unevenly cooked tenders. When you add too much to a pan or air fryer basket, the temperature plummets, and moisture released from the chicken has nowhere to go. It creates steam, which prevents browning. Cook in batches if you have to. It's worth the extra five minutes.
Mistake 3: Using the Wrong Oil Temperature. For pan-frying, if the oil isn't hot enough, the meat will absorb it and become greasy. If it's too hot, the outside burns before the inside cooks. Wait for that shimmer. For deep-frying, a thermometer is essential—aim for 350-375°F (175-190°C). Without one, you're guessing.
Your Chicken Tender Questions, Answered
Related Articles