Ultimate Buttermilk Chicken Recipe: Crispy, Juicy & Foolproof
Buttermilk chicken. It sounds simple enough—marinate chicken in buttermilk, coat it, fry it. But if you've ever ended up with soggy, bland, or greasy results, you know there's more to it. I've been making this for over a decade, tweaking every variable, and I'm here to share the recipe that never fails. Forget the guesswork; let's dive into how to make buttermilk chicken that's crispy on the outside, tender inside, and packed with flavor.
What You'll Find Inside
Why Buttermilk Chicken Works So Well
The magic of buttermilk isn't just folklore. It's science. Buttermilk is acidic, which breaks down proteins in the chicken, making it incredibly tender. It also helps the coating adhere better. Most recipes gloss over this, but here's a key point: the acidity level matters. Full-fat buttermilk works best because it's thicker and clings to the chicken, but low-fat works in a pinch. I've tested both, and the difference in juiciness is noticeable but not drastic.
What really sets buttermilk chicken apart is the marinade time. Many say "overnight," but that can over-tenderize the meat, making it mushy. After countless batches, I found 4 to 6 hours is the sweet spot for boneless chicken, while bone-in pieces can go up to 8 hours. Anything longer, and you risk texture issues.
The Ingredients: What You Really Need
Let's get specific. You don't need fancy stuff, but quality counts. Here's a breakdown of the essentials.
| Ingredient | Quantity | Purpose & Notes |
|---|---|---|
| Chicken pieces (thighs or breasts) | 2 lbs (about 1 kg) | Bone-in for more flavor, boneless for easier eating. Thighs stay juicier. |
| Buttermilk | 2 cups | Full-fat preferred. If you don't have it, mix 1 cup milk with 1 tbsp lemon juice. |
| All-purpose flour | 1.5 cups | For the coating. Some add cornstarch for extra crisp—I'll explain later. |
| Paprika | 2 tsp | Adds color and a smoky hint. Sweet or smoked paprika works. |
| Garlic powder | 1 tsp | Essential for depth. Fresh garlic in the marinade can burn. |
| Salt and black pepper | 1 tsp each | Season generously. I use coarse sea salt for better distribution. |
| Vegetable oil (for frying) | Enough to fill pot 2 inches | Peanut oil gives great flavor, but canola or vegetable oil is fine. |
Some recipes call for eggs or baking powder. I skip eggs because buttermilk already acts as a binder. Baking powder can help with crispiness, but it's not mandatory if you fry at the right temperature.
Step-by-Step Cooking Process
Follow these steps closely. Rushing any part can lead to disappointment.
Step 1: Marinate the Chicken
Place the chicken in a large bowl or zip-top bag. Pour the buttermilk over it, ensuring every piece is coated. Add a pinch of salt and pepper to the buttermilk. Seal and refrigerate. Don't leave it on the counter—bacteria love buttermilk. I marinate mine for exactly 5 hours for boneless thighs. You'll see the chicken plump up.
Step 2: Prepare the Coating
While the chicken marinates, mix the flour, paprika, garlic powder, salt, and pepper in a shallow dish. Here's a trick: add 2 tablespoons of cornstarch to the flour. It absorbs moisture and creates a lighter, crispier crust. I learned this from a chef friend, and it's a game-changer.
Step 3: Coat the Chicken
Remove chicken from buttermilk, letting excess drip off. Don't wipe it—that moisture is key. Dredge each piece in the flour mixture, pressing firmly to ensure an even coat. Shake off loose flour. Some double-dip by going back to buttermilk and flour, but that often leads to a thick, doughy crust. Single coat is better for crispiness.
Step 4: Fry to Perfection
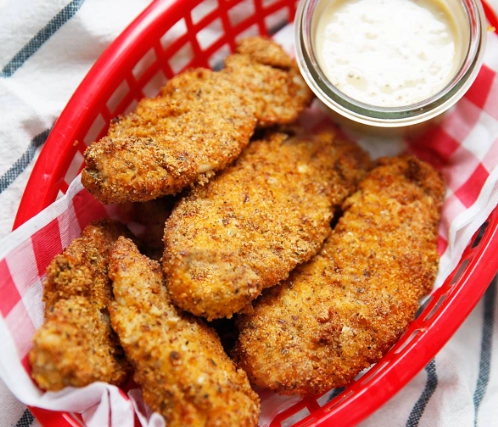
Heat oil in a deep pot or Dutch oven to 350°F (175°C). Use a thermometer; guessing is the top mistake. Carefully add chicken pieces without overcrowding—fry in batches. Fry for 12-15 minutes for bone-in, 8-10 for boneless, until golden brown and internal temperature reaches 165°F (74°C). Drain on a wire rack, not paper towels. Paper towels trap steam and make the bottom soggy.
Pro Tip: Let the coated chicken sit for 10 minutes before frying. This lets the coating set, reducing flour fallout in the oil.
Deep Frying vs. Air Frying vs. Baking
Not everyone wants to deep fry. Here's a honest comparison based on my tests.
| Method | Temperature & Time | Result | Best For |
|---|---|---|---|
| Deep Frying | 350°F, 10-15 min | Ultra-crispy, juicy, classic texture | Special occasions, flavor purists |
| Air Frying | 375°F, 18-22 min | Crispy but drier, needs oil spray | Health-conscious, quick cleanup |
| Baking | 400°F, 25-30 min | Less crispy, can be tough | Large batches, avoiding oil |
I prefer deep frying for that authentic crunch. Air frying is decent, but you must spray the chicken with oil before cooking, or it'll look pale. Baking? Honestly, it often disappoints—the coating doesn't get as crisp unless you use a rack and high heat. If you bake, place chicken on a wire rack over a baking sheet to allow air circulation.
Pro Tips Most Recipes Don't Tell You
These insights come from years of trial and error.
Use ice-cold buttermilk. It keeps the chicken cold, which prevents the coating from sliding off during frying. I chill mine for an hour before marinating.
Season every layer. Add salt to the buttermilk and the flour. Underseasoning is a common flaw. Taste the flour mix—it should be slightly salty.
Fry at the right temperature. If oil is too low, chicken absorbs oil and gets greasy. Too high, it burns outside while raw inside. Maintain 350°F by adjusting heat between batches.
Let it rest. After frying, let chicken rest for 5 minutes on a wire rack. This allows juices to redistribute, so it stays moist when you bite in.
Watch Out: Don't reuse oil more than twice for frying chicken. It breaks down and affects flavor. Strain it after each use.
Common Mistakes and How to Fix Them
Even with a good recipe, things can go wrong. Here's how to salvage your batch.
Soggy crust: Usually from draining on paper towels or overcrowding the fryer. Use a wire rack, and fry in small batches. If it's already soggy, pop it in a 400°F oven for 5 minutes to crisp up.
Bland flavor: You didn't season enough. Next time, be generous with salt and spices. For now, serve with a flavorful sauce like honey mustard or spicy mayo.
Coating falls off: The chicken might have been too wet or not pressed firmly into flour. Ensure excess buttermilk drips off, and press the coating on. Also, letting it sit before frying helps.
Greasy chicken: Oil temperature was too low. Use a thermometer. If it's greasy, blot with paper towels and reheat in the oven briefly.
I once made a batch where the coating was perfect but the inside was dry. Turns out, I fried boneless breasts too long. Now I always use a meat thermometer—165°F internal, no more.
Your Buttermilk Chicken Questions Answered
Buttermilk chicken isn't just a recipe; it's a technique that rewards attention to detail. Start with good ingredients, control the temperature, and don't skip the resting steps. Whether you're frying for a family dinner or trying an air-fried version, this guide should help you nail it. Got more questions? Drop a comment—I've probably tested it.
Related Articles