How to Roast a Chicken: The Ultimate Guide for Crispy Skin & Juicy Meat
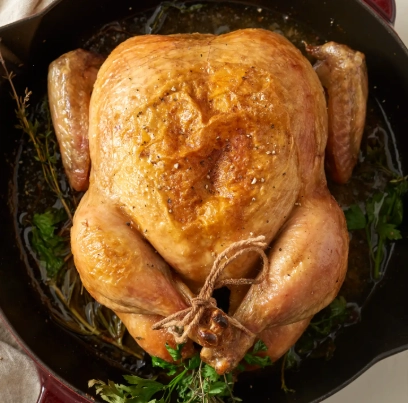
Roasting a whole chicken might seem intimidating, but it's one of the most rewarding and simple things you can cook. A golden, crispy-skinned bird with juicy, flavorful meat sitting in its own savory juices is a weeknight dinner hero and a Sunday showstopper. Forget dry, bland chicken. I've roasted hundreds over the years, and I'm here to show you that the secret isn't a complex recipe—it's a handful of non-negotiable techniques. This guide will walk you through every single step, explain the why behind them, and help you avoid the common pitfalls that trip up so many home cooks.
Your Roasting Roadmap
What You'll Need: The Chicken & The Tools
Let's start with the star. You can't build a great house on a bad foundation.
Choosing Your Chicken
Walk into any supermarket, and you're faced with a wall of confusing labels: organic, free-range, air-chilled, basted. What matters most for roasting?
Size: A 4 to 5-pound bird is the sweet spot. It's large enough to feed a family but small enough to cook evenly without drying out the breast before the thighs are done. A 3-pounder is great for two with leftovers; anything over 6 pounds can be tricky.
Type: If your budget allows, go for an air-chilled chicken. Most conventional chickens are water-chilled in massive baths, which can plump them up with added water (you're paying for that) and make the skin harder to crisp. Air-chilled birds have drier skin from the get-go, leading to superior browning. Organic or free-range often have better flavor and texture, but a standard bird roasted well will still be fantastic.
Here's a quick breakdown I wish I had when I started:
| Chicken Type | Key Characteristic | Impact on Roasting |
|---|---|---|
| Standard (Water-Chilled) | Most common, affordable. | Skin may be damp. Pat EXTREMELY dry. Still produces excellent results. |
| Air-Chilled | Drier skin, no added water. | Crispier skin more easily achieved. Often better flavor. |
| Organic/Free-Range | Specific feed & living conditions. | Can have firmer texture, more pronounced "chicken" flavor. Worth the splurge for a special meal. |
The Essential (and Non-Essential) Gear
You don't need fancy equipment. A heavy-duty rimmed baking sheet or roasting pan is your workhorse. I prefer a sheet pan with a wire rack. The rack elevates the chicken, allowing hot air to circulate for even cooking and browning on all sides, and it prevents the bottom from steaming in its juices.
Instant-read thermometer: This is non-negotiable. Relying on time or "clear juices" is a gamble. The USDA states that poultry is safe to eat at 165°F (74°C). For the juiciest meat, pull the chicken when the thickest part of the breast reads 155-160°F (68-71°C) and the thighs hit 170-175°F (77-79°C). Carryover cooking will raise the temp another 5-10 degrees while it rests.
Everything else—twine for trussing, a V-rack, a fancy poultry shears—is nice but optional. Your hands, a sharp chef's knife, and some paper towels are your best tools.
The Step-by-Step Roasting Method
This is the core process. Follow these steps in order, and you're 90% of the way to perfection.
Step 1: Preparation & Drying (The Most Important Step)
Remove the chicken from its packaging at least an hour before cooking. Take out the giblets (usually in a bag in the cavity). Now, the critical part: dry it relentlessly. Use a wad of paper towels and pat the entire exterior and the cavity bone-dry. This is the single biggest factor for crispy skin. Moisture is the enemy of browning.
Step 2: Seasoning Generously
Season the cavity with salt and pepper. Now, season the outside. Don't be shy. You want a good coating of kosher salt (it adheres better than fine table salt) and freshly ground black pepper over every centimeter of skin. Get under the wings and legs. For flavor, you can rub softened butter or a neutral oil like avocado oil under the skin on the breasts and over the whole bird. This adds richness and aids browning. Tuck the wingtips behind the back.
That's it for a classic roast. You can add herbs (thyme, rosemary) in the cavity or under the skin, or a halved lemon and some garlic cloves for aroma.
Step 3: The Roast Itself
Preheat your oven to 425°F (220°C). Yes, hot. Place the chicken breast-side up on your rack-set pan. Roast for 15 minutes at this high heat to kickstart the browning. Then, without opening the door, reduce the temperature to 375°F (190°C) and continue roasting. The total time will be roughly 20 minutes per pound, plus 15 minutes, but the thermometer is your guide.
Start checking the temperature at the 45-minute mark for a 4-pound bird. Insert the thermometer into the thickest part of the breast (avoiding bone) and the deepest part of the thigh. When it hits those target temps (155-160°F breast, 170-175°F thigh), it's done.
Step 4: The Crucial Rest
This is where many ruin a perfectly cooked chicken. You must let it rest. Transfer the chicken to a cutting board or platter and tent it loosely with foil. Let it sit for at least 15-20 minutes. This allows the frantic, hot juices that have rushed to the center to redistribute throughout the meat. If you cut it open immediately, all those juices will flood onto the board, leaving you with dry meat. Resting is non-negotiable for juiciness.
The Science of Crispy Skin: Dry vs. Wet
Everyone wants that crackling, golden skin. The method above will get you there. But let's talk about the two main schools of thought and a common point of confusion.
The Dry-Brine (Salt-Rub) Method: This is my personal favorite for guaranteed crispiness. The night before, after drying the chicken, rub it all over with kosher salt (about 1 tsp per pound). Leave it uncovered on a rack in the fridge. The salt seasons the meat deeply and, through osmosis, pulls moisture from the skin, drying it out even further. The result is skin that puffs and crackles like a potato chip.
The Classic Butter/Oil Baste: Rubbing the bird with fat before roasting promotes browning (the Maillard reaction) and adds flavor. Basting during cooking is largely theatrical—it does little for moisture but can help even out color. The real key is the initial fat layer on already-dry skin.
Here’s the truth bomb: Adding liquid (wine, broth) to the bottom of the pan while roasting creates steam, which is the antithesis of crispy skin. If you want a pan sauce (and you should), add your liquids after you remove the chicken to rest. Use the flavorful browned bits (fond) in the pan as your base.
| Method | Process | Best For |
|---|---|---|
| High-Heat Start | 425°F for 15 min, then 375°F. | Reliable, all-purpose crispiness. |
| Dry-Brine (Overnight) | Salt & air-dry in fridge for 8-24 hrs. | Ultimate, foolproof crackling skin & seasoned meat. |
| Butter Under Skin | Spread softened butter between skin & breast. | Incredibly rich flavor and moist breast meat. |
Common Roasting Mistakes & How to Avoid Them
I've made these so you don't have to.
Mistake 1: Not Drying the Skin. I sound like a broken record, but soggy skin = pale, rubbery skin. Paper towels are your best friend.
Mistake 2: Underseasoning. The seasoning doesn't penetrate deep into the muscle on such a short cook. You need a good amount on the surface for flavorful bites. Don't just sprinkle; coat it.
Mistake 3: Skipping the Rest. Cutting in too soon is a tragedy. The chicken continues to cook (carryover) and the juices settle. Wait. It's hard, but do it.
Mistake 4: Relying Only on Time. Ovens vary. Chicken sizes vary. A thermometer removes all doubt. Invest in one.
Mistake 5: Crowding the Pan. If you add a bunch of vegetables around the chicken, they'll release steam and prevent browning. Roast veggies on a separate tray if you want them crispy.
Carving Your Masterpiece
You've waited, now enjoy. Place the rested chicken breast-side up. Use a sharp knife.
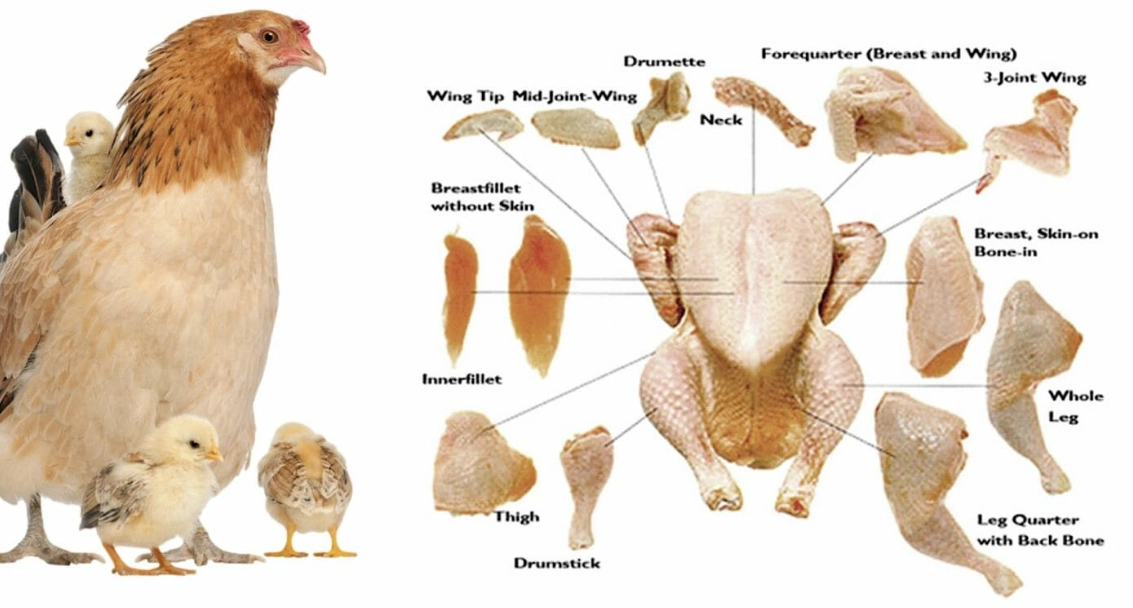
First, remove the legs. Pull a leg away from the body and cut through the skin and joint connecting it. Separate the thigh from the drumstick by cutting at the joint. Repeat on the other side.
For the breasts, make a long horizontal cut just above the wing joint along the breastbone. Then, slice down along the rib cage, gently pulling the breast meat away as you cut to free it in one whole piece. Slice each breast crosswise into servings. Don't forget the "oysters"—two succulent, tender pieces of dark meat on the back, near the thigh joints. They're the cook's reward.
Your Roasting Questions, Answered
Related Articles