The Ultimate Guide to Roasting a Whole Chicken: Times, Temps & Tips
You've got the chicken. You've got the oven preheated. Now, the big question hangs in the air: how long does this thing actually need? If you search online, you'll find a hundred answers, from "20 minutes per pound" to vague recipes that just say "roast until done." It's frustrating. The real answer isn't a single number. It's a combination of weight, temperature, method, and a few kitchen truths most recipes don't bother to tell you. After roasting more chickens than I can count—some perfect, some dry, some embarrassingly undercooked near the bone—I've learned that timing is the last piece of the puzzle, not the first. Let's cut through the noise.
What's Inside This Guide
The Standard Roasting Time by Weight
Let's start with the baseline. For a standard, unstuffed whole chicken roasted at 375°F (190°C) to 400°F (200°C), here's the general framework. Remember, this is a guide, not a gospel.
| Chicken Weight (lbs) | Approximate Roasting Time | Internal Temp Target | Key Visual Cue |
|---|---|---|---|
| 3 lbs | 1 hour 15 minutes - 1 hour 30 minutes | 165°F (74°C) in breast, 175°F (79°C) in thigh | Juices run clear, legs wiggle freely |
| 4 lbs | 1 hour 30 minutes - 1 hour 45 minutes | 165°F (74°C) in breast, 175°F (79°C) in thigh | Skin is golden brown and crisp |
| 5 lbs | 1 hour 45 minutes - 2 hours 5 minutes | 165°F (74°C) in breast, 175°F (79°C) in thigh | Meat pulls easily away from bone |
| 6 lbs (Roaster) | 2 hours - 2 hours 25 minutes | 165°F (74°C) in breast, 175°F (79°C) in thigh | Very golden, may need foil tent for last 30 min |
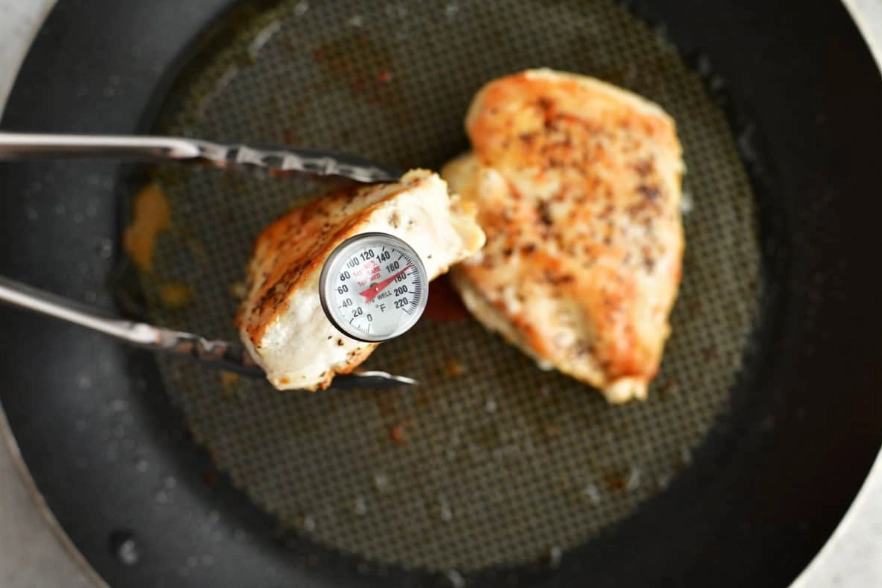
See that internal temperature column? That's your boss. The time is just an employee. A meat thermometer is the single best investment for nailing a whole chicken. The USDA recommends a safe minimum temperature of 165°F (74°C) for poultry. For the best texture, aim for that in the thickest part of the breast, but let the thighs get to about 175°F (79°C). The higher temp in the thigh helps render the fat and connective tissue, making dark meat succulent instead of rubbery.
I learned this the hard way. I used to pull the chicken the second the breast hit 165°F, only to find the thighs were still unpleasantly chewy. Now I check both spots.
How Your Cooking Method Changes the Clock
"Roasting" isn't one method. How you set up your oven and prepare the bird changes everything.
High-Heat Roasting (425°F - 450°F / 220°C - 230°C)
This is my go-to for weeknights. Crank the heat for crispy skin and a faster cook. A 4-pound chicken might be done in about 1 hour to 1 hour 15 minutes. The downside? You have to watch it like a hawk after 45 minutes to prevent the skin from burning. A little smoke in the kitchen is common.
Low and Slow Roasting (325°F / 160°C)
This method promises incredibly tender, fall-off-the-bone meat. It works. But it takes time. That same 4-pound chicken could take 2 to 2.5 hours. The skin often ends up pale and flabby, which is a dealbreaker for some. If you go this route, consider finishing under the broiler for a few minutes to crisp it up.
Spatchcocking (Butterflying)
This is the game-changer nobody does but everyone should. By cutting out the backbone and pressing the chicken flat, you create a uniform thickness. It cooks up to 25-30% faster and the skin crisps evenly. A spatchcocked 4-pound chicken at 425°F can be on the table in 45-50 minutes. The prep takes 5 extra minutes with good kitchen shears. It's the most reliable method for a perfect result on a tight schedule.
Pro-Tip from the Trenches: Most recipes and time charts assume you're starting with a room-temperature chicken. If you throw a cold, fridge-temperature bird straight into the oven, add 10-15 minutes to your estimated cook time. Letting it sit out for 30-45 minutes before roasting leads to more even cooking.
You're Not Done When the Timer Beeps: The Resting Rule
This is the most skipped step, and it's why so many home cooks end up with dry chicken. When you pull the chicken from the oven, the heat is racing from the outside in, and the juices are all gathered at the center. If you cut it immediately, those juices will flood the cutting board, not stay in the meat.
Let it rest. Tent it loosely with foil on the cutting board for at least 15-20 minutes for a standard-sized bird. During this time, the internal temperature will actually continue to rise slightly (carryover cooking), and the juices will redistribute.
The chicken will still be warm when you carve it, but it will be juicier in every single bite. I don't make the rules of physics, I just follow them.
3 Common Timing Mistakes That Ruin a Chicken
Beyond just misreading the clock, these errors throw off your whole timeline.
Mistake 1: Roasting a Wet Chicken. Pat that bird dry, inside and out, with paper towels until the skin is bone-dry. A wet skin steams instead of roasts, leading to rubbery skin and a longer cooking time as the oven works to evaporate all that moisture. This is non-negotiable.
Mistake 2: Overcrowding the Pan. You want to roast potatoes and carrots alongside? Great. But if they're piled up and touching the chicken all over, they'll act as a heat shield and create steam. Give everything space. Use a larger pan or roast the veggies on a separate tray.
Mistake 3: Opening the Oven Door to Peek. Every time you open the door, the temperature drops 25-50 degrees. The oven then has to work hard to recover, extending your cook time. Use the oven light and look through the window. Trust the process and the thermometer.
A Safety Note: Relying solely on "juices running clear" or "legs wiggling easily" is risky. These are good secondary signs, but they are not foolproof indicators that the chicken has reached a safe temperature throughout. A properly calibrated instant-read thermometer is your only guarantee. For official food safety guidelines, you can refer to resources from the USDA Food Safety and Inspection Service.
Your Roasting Questions, Answered
So, how long does it take to cook a whole chicken? For a 4-pounder, plan for about 1.5 hours of active roasting, plus 20 minutes of resting. But now you know that number is fluid. It depends on your chosen method, your oven's personality, and how you've prepped the bird. Ditch the single-minded focus on the clock. Embrace the thermometer, understand the methods, and respect the rest. That's how you move from asking "is it done yet?" to knowing, confidently, that it's going to be perfect.
Related Articles