Safe Chicken Temperatures: A Complete Guide to Doneness & Safety
Let's cut to the chase. The single biggest mistake in home cooking isn't over-salting or burning garlic. It's guessing when chicken is done. I've seen it a hundred times – someone pokes a breast, thinks it feels firm, and ends up serving a meal that's either a dry, stringy mess or, worse, a potential health hazard. The difference between a perfectly juicy chicken thigh and a leathery one, or between safe and risky, boils down to a few degrees. That's where understanding chicken internal temperature becomes your most powerful kitchen skill.
Forget the old "clear juices" myth. We're going to talk real numbers, real science, and real techniques that work. This isn't just about hitting 165°F (74°C). It's about understanding carryover cooking, knowing the safe temps for different cuts, and learning how to check without relying on a single, often misunderstood, tool. I learned this the hard way after ruining one too many Sunday roasts. Now, I want you to get it right the first time.
What You'll Find in This Guide
Why Chicken Temperature is Non-Negotiable
You've probably heard the number 165°F (74°C) thrown around. That's the magic number from the USDA Food Safety and Inspection Service for destroying harmful bacteria like Salmonella and Campylobacter. It's not an arbitrary figure; it's the temperature at which these pathogens are instantly killed. Go below that, and you're playing a dangerous game.
But here's the nuance most recipes skip: 165°F is the minimum safe temperature for instant kill. You can also achieve safety through a combination of temperature and time. According to USDA data, holding chicken at 155°F (68°C) for just under a minute achieves the same level of safety. At 150°F (66°C), you need to hold it for about 3 minutes. This is crucial for methods like sous-vide, but for most home cooking, aiming for 165°F in the thickest part is the simplest, safest rule.
The other side of the coin is quality. Muscle fibers in chicken start to tighten and squeeze out moisture around 150-155°F. Push it much past 165°F, especially in lean cuts like the breast, and you enter the Sahara Desert of doneness. Dark meat (thighs, legs) has more fat and connective tissue, which can handle and even benefit from slightly higher temperatures (175-195°F) to become fall-off-the-bone tender. So, temperature isn't just a safety stop sign; it's your roadmap to texture.
The Ultimate Chicken Temperature Chart
Stop searching across ten different blogs. Here’s the consolidated, actionable data you need. Remember, these are final internal temperatures after resting. Always insert your thermometer into the thickest part, avoiding bone.
| Chicken Cut & Style | Target Internal Temp (Fahrenheit) | Target Internal Temp (Celsius) | Key Notes for Best Results |
|---|---|---|---|
| Chicken Breast (boneless, skinless) | 155°F - 160°F | 68°C - 71°C | Pull at 155°F, rest 5 mins. It will carry over to 160°F+ and be juicy. 165°F is safe but often drier. |
| Chicken Thighs & Legs (bone-in) | 175°F - 185°F | 79°C - 85°C | Higher temp renders fat and breaks down connective tissue for tender, flavorful meat. |
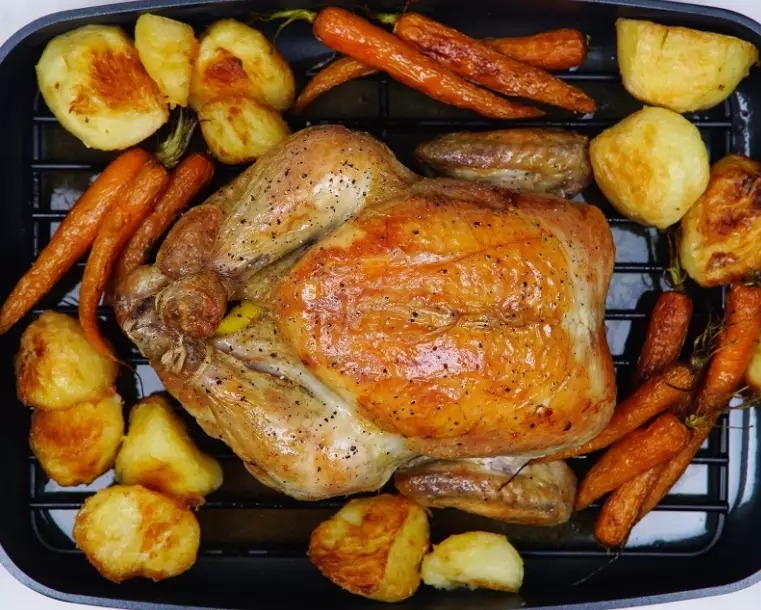
| Whole Roast Chicken | 165°F in breast, 175°F+ in thigh | 74°C in breast, 79°C+ in thigh | Check both spots. The thigh temp is more critical for doneness. |
| Ground Chicken (burgers, meatballs) | 165°F | 74°C | No exceptions. Bacteria can be mixed throughout, not just on the surface. |
| Chicken Wings | 165°F - 175°F | 74°C - 79°C | Ensure meat near the joint is fully opaque. Crispy skin needs high heat, but check internal temp. |
| Chicken for Soups/Stews (shredded) | 165°F+ (then simmer) | 74°C+ | Cook to safe temp first, then continue simmering until easily shreddable. |
Carryover Cooking is Real: When you take chicken off the heat, its internal temperature continues to rise by 5°F to 10°F (3°C to 6°C) as the outer heat moves inward. This is why pulling a breast at 155°F is a pro move – it finishes cooking perfectly during the rest.
How to Check Chicken Temperature Like a Pro
Buying a good instant-read thermometer (like a Thermapen or similar) is the best $50 you'll spend in the kitchen. But let's talk technique, because I've seen people waste a great tool.
The Right Spot, Every Time
For a breast, aim for the center of the thickest part. For a thigh or leg, go into the meatiest area, parallel to the bone – don't touch the bone, as it conducts heat and gives a false high reading. For a whole bird, you must check two places: the breast and the innermost part of the thigh.
What If You Don't Have a Thermometer?
You're flying blind, but there are clues. The "clear juices" test is unreliable. A better method: pierce the thickest part with a knife or skewer and check the color of the juices. They should run completely clear, not pink or red. Also, the meat should feel firm to the touch (not hard), and the fibers should look opaque all the way through when you make a small cut. Honestly, this is guesswork compared to a thermometer.
I used to rely on the "wiggle the leg" test for a whole chicken. If the leg joint moves easily, it's done. That works okay, but it only tells you about the dark meat. The breast could still be under or, more commonly, overcooked by the time the leg is loose.
Common Chicken Cooking Mistakes and How to Fix Them
Let's diagnose some common failures. I've been guilty of most of these.
Mistake 1: Cooking all cuts to the same temperature. This is the breast-killer. Applying the thigh's 180°F goal to a breast will guarantee sawdust. Use the chart above. Treat different cuts differently.
Mistake 2: Not letting chicken rest. You slice into a beautiful breast right off the grill, and all the juices flood the cutting board. Those juices are flavor and moisture. Let the chicken rest, tented loosely with foil, for at least 5-10 minutes (longer for a whole bird). The fibers relax and reabsorb the liquid.
Mistake 3: Relying solely on cooking time. "Bake for 25 minutes" is a suggestion, not a law. Your oven's calibration, the starting temperature of the chicken, the thickness of the cut – all these variables make time a terrible master. Temperature is the only reliable servant.
Mistake 4: Crowding the pan. You're trying to sear chicken, but you put four pieces in a cold 10-inch skillet. They steam instead of sear, which drastically changes cooking time and prevents that flavorful brown crust from forming. Cook in batches if you have to.
Here's a specific scenario: You're making baked chicken legs. The recipe says 400°F for 40 minutes. You pull them out, and the skin is gorgeous, but when you check with a thermometer, it's only 150°F in the thigh. What now? Don't just put them back in. Crank the oven to 450°F, place the legs on a fresh sheet (so they don't sit in rendered fat), and blast them for another 5-8 minutes, checking temp frequently. The skin might get a little darker, but you'll get to the safe zone without completely drying them out.
Your Burning Questions, Answered
Related Articles